Simple Techniques For Hanging Frameless Mirrors
A frameless mirror adds elegance, but getting it on the wall without wobbling is another story.
The wrong approach risks cracks, uneven mounting, or a shattered disaster.
Securing it properly requires the right method for the space and surface.
Whether floating sleekly or resting flush, a few smart techniques ensure it stays put.
Techniques for Mounting a Frameless Mirror
Mounting a frameless mirror calls for precision to maintain its minimalist design.
Selecting the appropriate technique ensures a secure and polished result.
Simple, creative methods can transform the installation into an elegant display.
Securing with Adhesive
Start with a sanding block to smooth the surface before applying anything.
High-grade adhesive will ensure everything sticks well, while a holding brace made of scrap plywood or metal provides stability during the process.
Painters tape helps keep lines clean and prevents paint from spreading where it shouldn’t go.
An electric drill is essential for making holes if needed, ensuring that installation goes smoothly.
A 6-inch paintbrush allows for precise application of primer and paint, giving surfaces a fresh look in no time.
Having these tools ready sets the stage for an efficient project ahead.
Outline the Mirror Placement with a Pencil
Gathering materials sets the stage for a smooth installation.
A pencil helps pinpoint the mirror's desired height, ensuring precision right from the start.
Using a level guarantees that your mirror hangs perfectly straight, avoiding any crookedness.
Marking both corners allows you to visualize placement clearly before securing it to the wall.
Use Painter’s Tape to Mark Key Spots on the Wall
Taking care when positioning your mirror is essential, especially since it will be a permanent fixture.
Use four pieces of painters tape to mark the precise spots on the wall where you plan to hang it.
This method allows for adjustments before committing with adhesive, ensuring everything aligns perfectly in the end.
Planning ahead saves time and effort later, so double-check those placements!
Lightly Sand the Wall Surface
Preparing the wall for mirror installation is essential for a secure fit.
Sanding down to the drywall guarantees maximum adhesion, providing a solid foundation.
After achieving that smooth surface, dust must be removed thoroughly to avoid any interference with the adhesive.
A simple clean-up with a towel or tack cloth will ensure optimal results when placing your mirror.
Apply a Primer Coat to the Wall
Applying primer to a wall sets the stage for a flawless mirror installation.
A couple of coats ensure that the surface is ready and smooth, enhancing the final look.
Patience is key; allow each coat to dry thoroughly before moving on to the next one.
Finding quality primer online can be convenient; check Amazon for various options tailored to your needs.
Install a Support Brace for Stability
Holding a mirror in place during adhesive drying can be tricky, but a sturdy brace simplifies the process.
Using plywood scraps for this support is both practical and resourceful.
Drilling pilot holes before inserting screws prevents damage to your wall and ensures precise alignment.
Securing the brace effectively will provide peace of mind as your mirror sets perfectly in place.
Apply Mirror Adhesive to the Back
Applying adhesive to the back of the mirror requires careful precision.
Keep a distance of at least two inches from the edges to prevent any excess from oozing out.
This technique ensures a clean finish and maintains an aesthetically pleasing appearance.
Securing your mirror properly will enhance its stability and longevity, making it a lasting part of your decor.
Secure the Mirror Firmly to the Wall
Position the mirror gently against the wall, ensuring it aligns with your desired height.
Apply pressure to the corners and edges, securing it firmly in place.
It's important to let this setup rest for a full day before taking off any supporting brace.
Patience here ensures that everything stays perfectly aligned and secure for long-term enjoyment.
Attaching with Mounting Clips
Gather essential tools for your project.
A measuring tape ensures accuracy in measurements.
Use a hammer and screws for secure fastening.
A pencil will help mark important points clearly on the surface.
Mounting brackets provide strong support, while a level guarantees everything stays straight and even.
Phillips-head and flathead screwdrivers assist in tightening screws with ease.
Mark the Desired Hanging Location on the Wall
Gathering tools and materials sets the stage for a successful project.
Begin by marking the desired location on the wall where your mirror will hang, ensuring it aligns perfectly with your decor.
Using a level helps achieve precision, allowing vertical marks to guide you in placing both edges of the mirror accurately.
With clear marks in place, you're ready to move forward confidently with hanging your mirror in style.
Find the Wall Studs for Support
Finding the right spots for hanging a mirror can be simple with a stud finder.
This tool helps locate wooden or metal studs behind your wall, ensuring your mirror has a secure anchor.
Once you identify the studs, mark their positions with a pencil for accuracy.
A well-placed stud provides stability and prevents any mishaps in the future, so take that extra moment to get it right before hanging up your beautiful new piece!
Indicate Where the Clips Will Be Installed
Locating the studs is just the beginning of a secure mirror installation.
Small pencil lines mark where clips will sit, ensuring they align perfectly with both the top and bottom of your mirror.
Maintaining even spacing prevents any tilting that could spoil its look while positioning away from stud edges enhances stability.
Aligning these marks with the back of your mirror guarantees a neat finish that complements your space beautifully.
Drill Pilot Holes for the Mounting Clips
Drilling pilot holes sets the stage for a sturdy installation.
Wall anchors provide strong support, ensuring clips hold securely.
Each clip needs careful placement; U-shaped clips belong at the bottom, while L-shaped ones fit on top.
An electric drill from Amazon simplifies this task and enhances efficiency in your project.
Securely Attach the Mirror in Place
Positioning the mirror requires careful attention to detail.
After aligning the clips, gently slide the mirror along the bottom clips until it rests securely against the wall.
Ensure that it fits snugly into both top and bottom clips for stability.
Tightening those top clips with a screwdriver will secure everything firmly, giving you a polished finish that enhances your space beautifully.
Best Spots to Hang a Mirror in Your Home
Mirrors enhance the ambiance of any room with their reflective qualities.
Placing one opposite a window invites natural light to dance throughout your space, creating an airy feel.
A well-placed mirror in a narrow hallway can create an illusion of width, making it feel more open and inviting.
Consider using decorative mirrors above mantels or sideboards; these serve as stunning focal points that catch the eye instantly.
In bedrooms, positioning a mirror near lighting can highlight your personal style while adding depth to the decor.
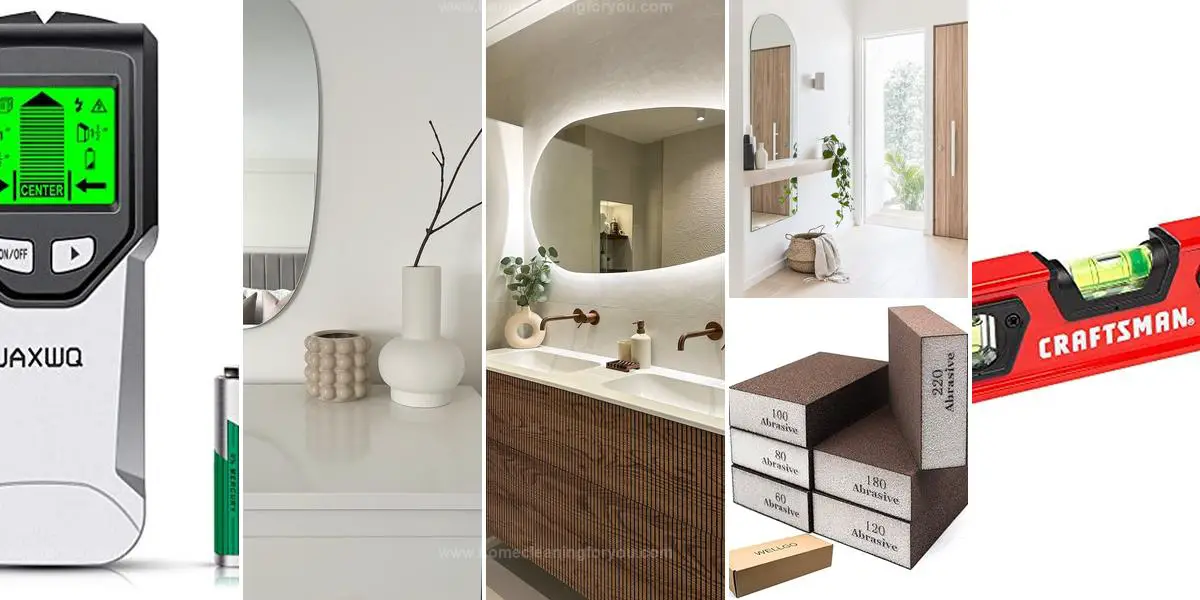
Placing in the Entryway
A quick glance in the mirror before heading out is essential.
Having a mirror near the front door makes it easy to do this.
Placing a small table alongside enhances the area nicely.
This setup not only looks appealing but also adds convenience for last-minute checks on your appearance.
Guests will appreciate this thoughtful arrangement as they come and go, making each exit feel polished and prepared for any occasion.
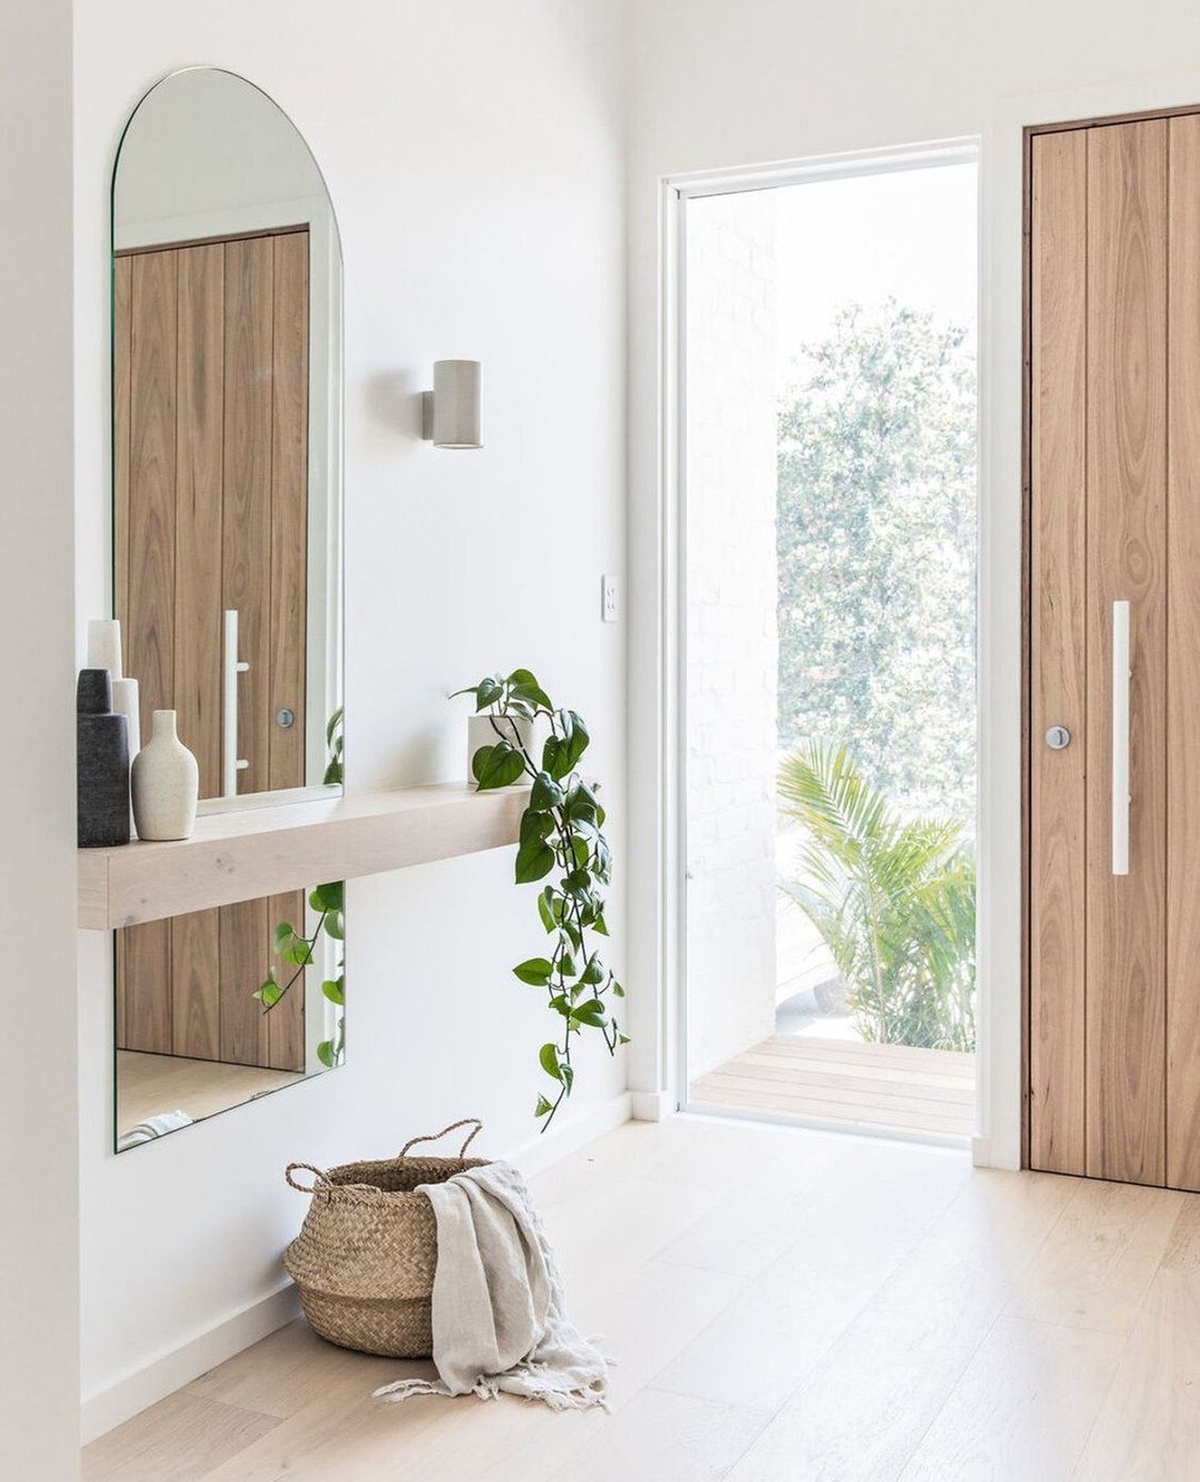
Positioning in the Bedroom
Full-length mirrors enhance bedrooms beautifully.
These mirrors can fit nicely on closet doors or bedroom doors, allowing for easy outfit checks.
Leaning one against the wall creates a stylish look while offering a practical space to assess new clothes and shoes.
Their placement not only adds functionality but also helps in brightening the room with reflected light.
Using mirrors effectively turns any bedroom into a more spacious area, making it feel inviting and open.
An ideal addition to any decor style, they serve both aesthetic and practical purposes effortlessly.
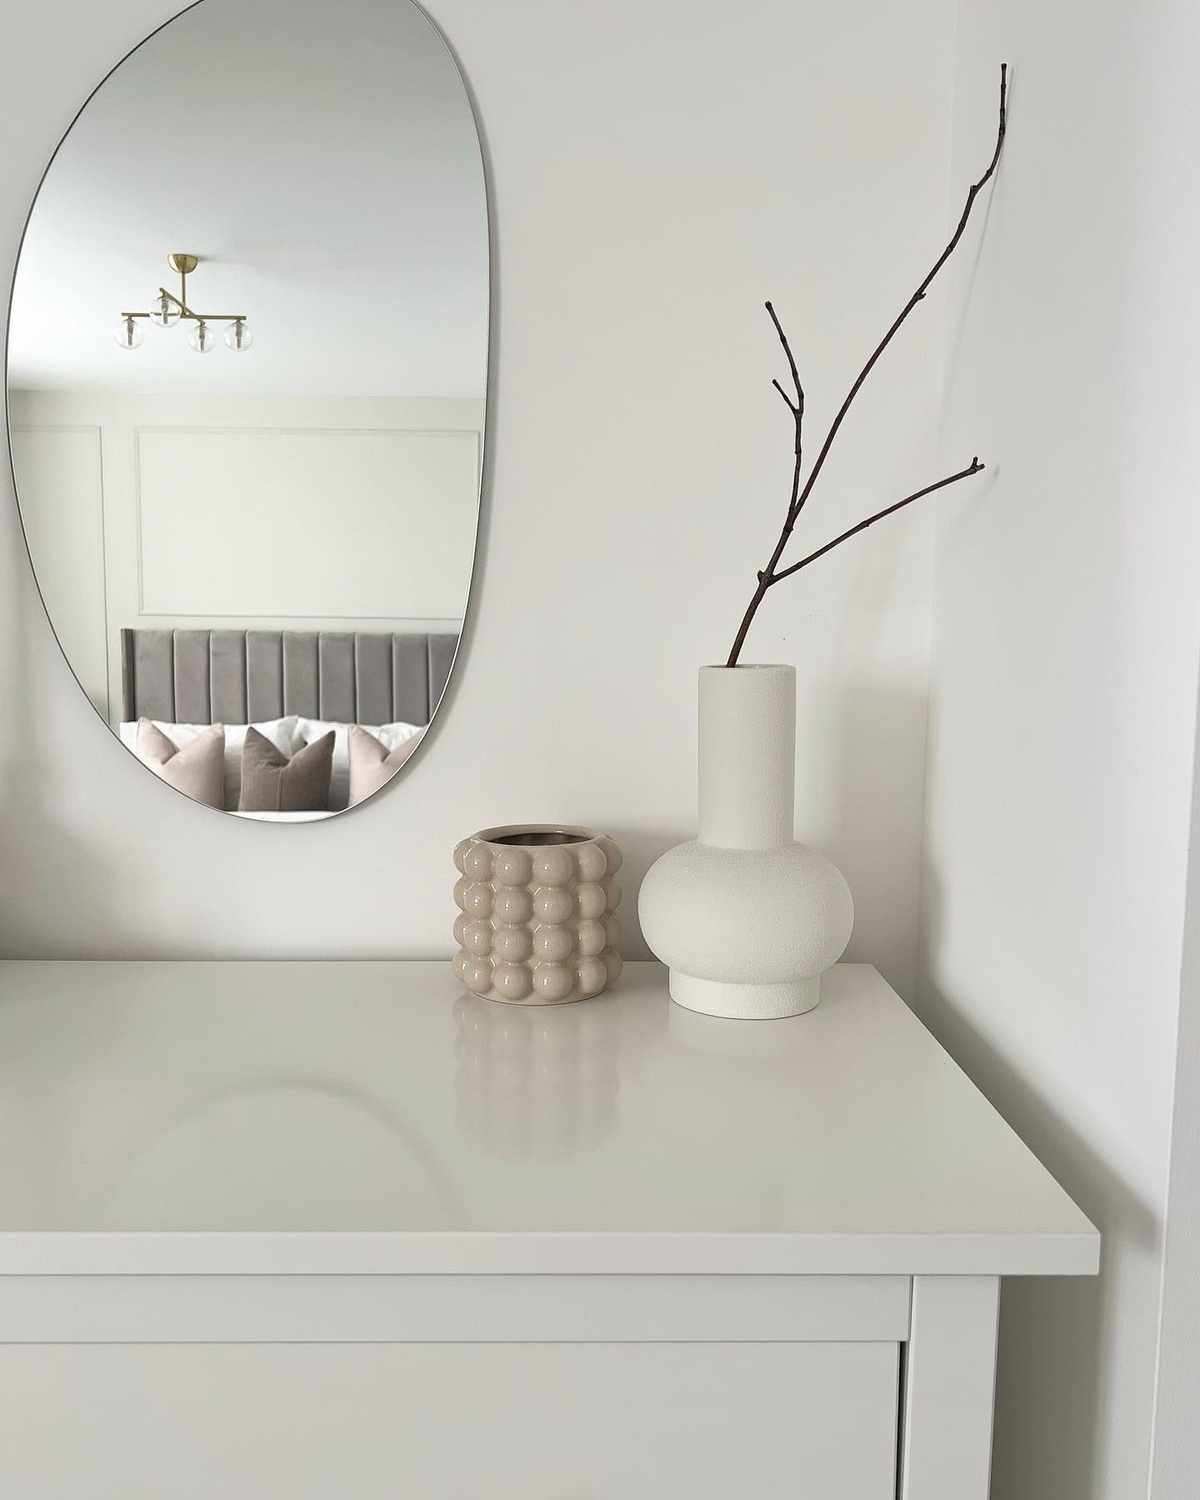
Installing in the Bathroom
Adding another mirror to a bathroom can enhance the space significantly.
A mirror above the sink serves a practical purpose and adds depth to the room.
Consider positioning a magnifying mirror on an adjacent wall; it offers great convenience for tasks like shaving or applying makeup.
Many homes already feature at least one bathroom mirror, yet there's no rule against incorporating more for style and functionality.
Elevating your daily routine with additional mirrors creates both beauty and ease in this essential area of your home.
Hanging Over the Fireplace
A mirror hung above the fireplace adds a classic touch to any living space.
This arrangement enhances the warmth of a cozy fireplace while also creating an illusion of more space.
Fireplaces naturally draw people in, making them inviting spots for gathering.
Mirrors can reflect light and colors, brightening up the room's atmosphere.
The combination of these elements makes for a welcoming environment that feels open and spacious.
Traditional designs often highlight this pairing as an elegant choice in home decor.
How Can You Enhance the Look of a Frameless Mirror?
Decorating a mirror opens up a world of creativity and personal expression.
Applying mirror paint can transform an ordinary reflection into something striking and unique, adding depth to any space.
Floral arrangements beneath the mirror introduce freshness and life, enhancing the overall aesthetic with natural beauty.
Framing your mirror with decorative tiles or wood creates visual interest while also providing character to the room.
Simple changes like these can elevate your decor, making everyday moments feel special as you admire your personalized touch each day.
Which Adhesive Works Best for Mirrors?
Choosing the right adhesive for attaching a frameless mirror to your wall can make all the difference.
Look for products specifically designed for heavy-duty bonding, as these will provide the strength needed to hold your mirror securely.
A clear silicone adhesive is often favored because it offers flexibility and excellent moisture resistance, perfect for areas like bathrooms.
For added convenience, consider a quick-setting epoxy that cures rapidly while maintaining strong adhesion over time.
Always check compatibility with both your mirror and wall materials before making a decision; ensuring proper support leads to lasting results you can trust.
Gorilla Max Strength Clear Adhesive for Construction

Gorilla Glue's strongest construction adhesive excels in holding various materials together.
Stone, glass, laminate, and wood bond securely with this powerful glue.
Hanging mirrors becomes a hassle-free task when using this reliable product.
Trust its strength for all your building needs and projects around the home.
For convenience, it’s readily available on Amazon for easy purchase.
CRL Gunther Premier Mastic for Mirrors
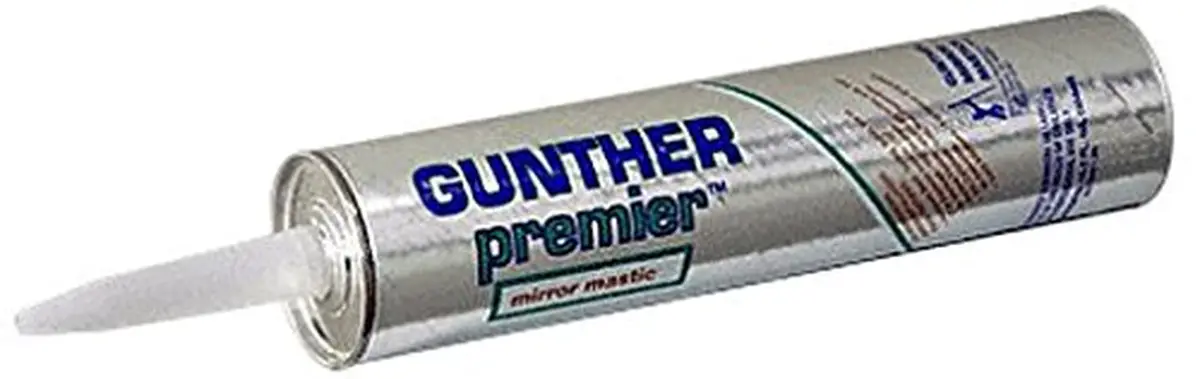
Flexible and strong, this permanent bonding adhesive works well on both porous and non-porous surfaces.
It ensures a reliable hold for various projects, including securing frameless mirrors in place.
The high-quality adhesion makes it suitable for a range of applications around the home or office.
For convenience, this product is available for purchase on Amazon.
A dependable choice can enhance your DIY efforts effortlessly while providing lasting results.
Liquid Nails Adhesive for Mirrors
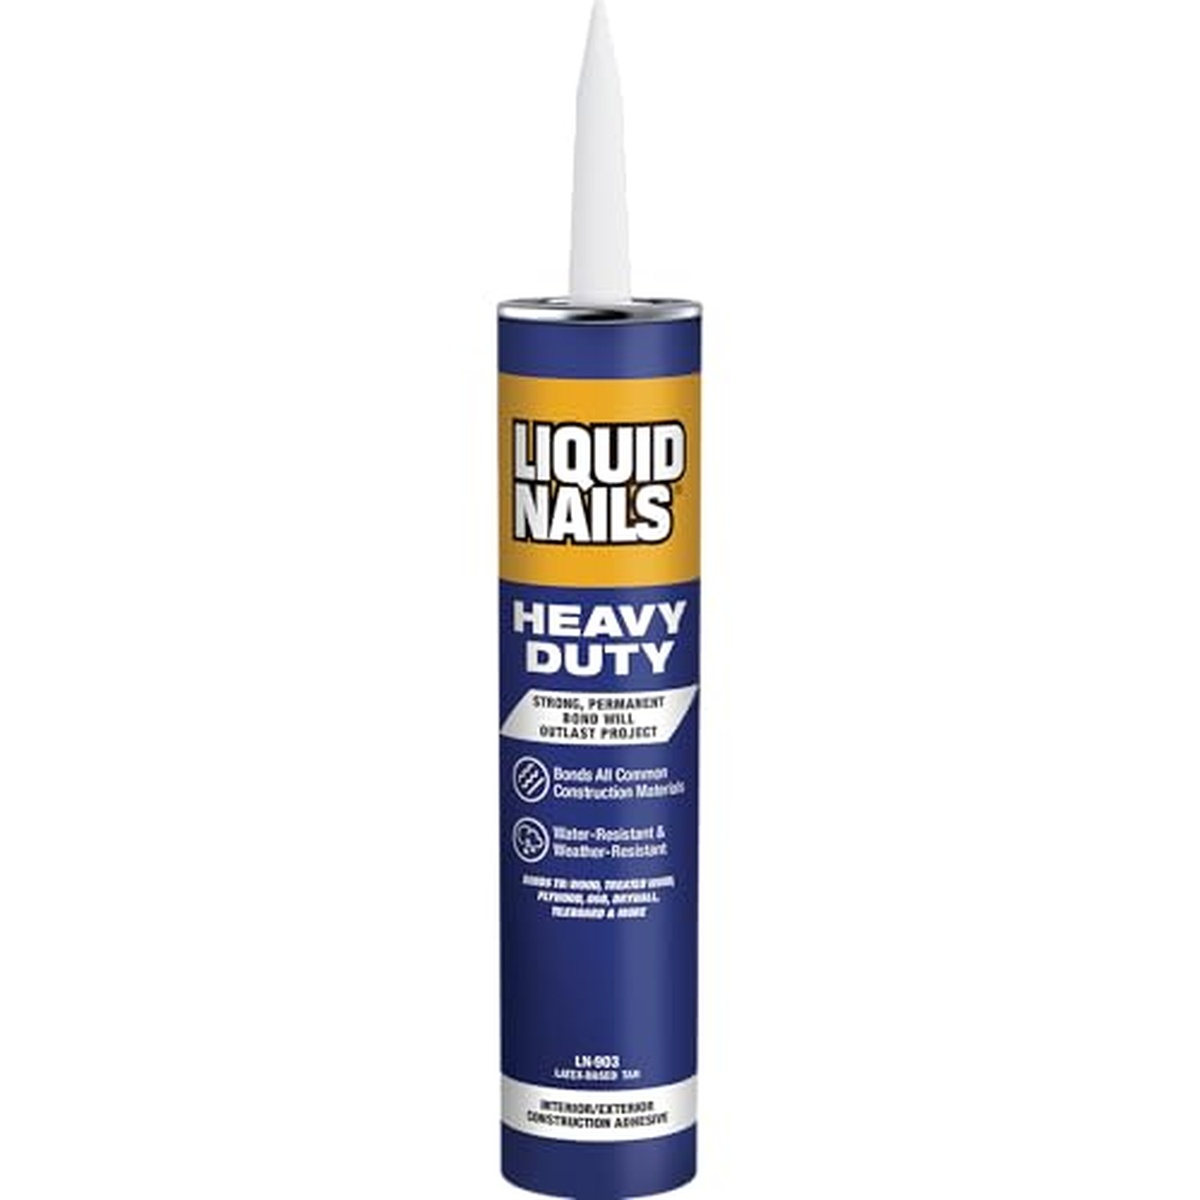
Liquid Nails serves as a reliable adhesive for frameless mirrors.
This strong bonding agent protects the mirror's backing while ensuring a secure hold.
Quick adhesion occurs within just 10 minutes, making it efficient for various projects.
Heat and steam resistance adds to its durability, allowing it to withstand bathroom conditions without losing grip.
Such features make Liquid Nails an excellent choice for those seeking long-lasting results in mirror installation or similar tasks.
Opting for this adhesive guarantees peace of mind when hanging mirrors securely.
What Is the Maximum Weight Mirror Clips Can Support?
Mirror clips serve as a practical solution for hanging mirrors, accommodating weights up to 20 lbs.
When dealing with heavier mirrors, additional support becomes essential.
Toggle bolts or masonry anchors offer a reliable way to secure these larger pieces firmly against the wall.
Choosing the right hardware ensures safety and stability in your decor choices.
With proper installation techniques, you can confidently showcase your favorite mirrors without worry.
Kevin Jones
Founder & Chief Home Organization Strategist
Expertise
Home Organization & Decluttering, Efficient Cleaning Methods & Stain Removal, Sustainable Cleaning Practices, DIY Home Maintenance & Repairs, Space Optimization & Storage Solutions, Budget-Friendly Home Care Strategies
Education
University of Texas at Austin
Kevin Jones is the Founder and Chief Home Organization Strategist at HomeCleaningForYou.com.
He earned a Bachelor of Science in Interior Design from the University of Texas at Austin, focusing on space planning and sustainable design. Specializing in home organization, decluttering, and budget-friendly home care, he helps homeowners create functional and stylish spaces.
Kevin has been featured in lifestyle publications and has collaborated with eco-friendly brands on home organization solutions. He shares his expertise through DIY guides, workshops, and online tutorials. Passionate about minimalism, he enjoys testing new organization methods and exploring sustainable living ideas.