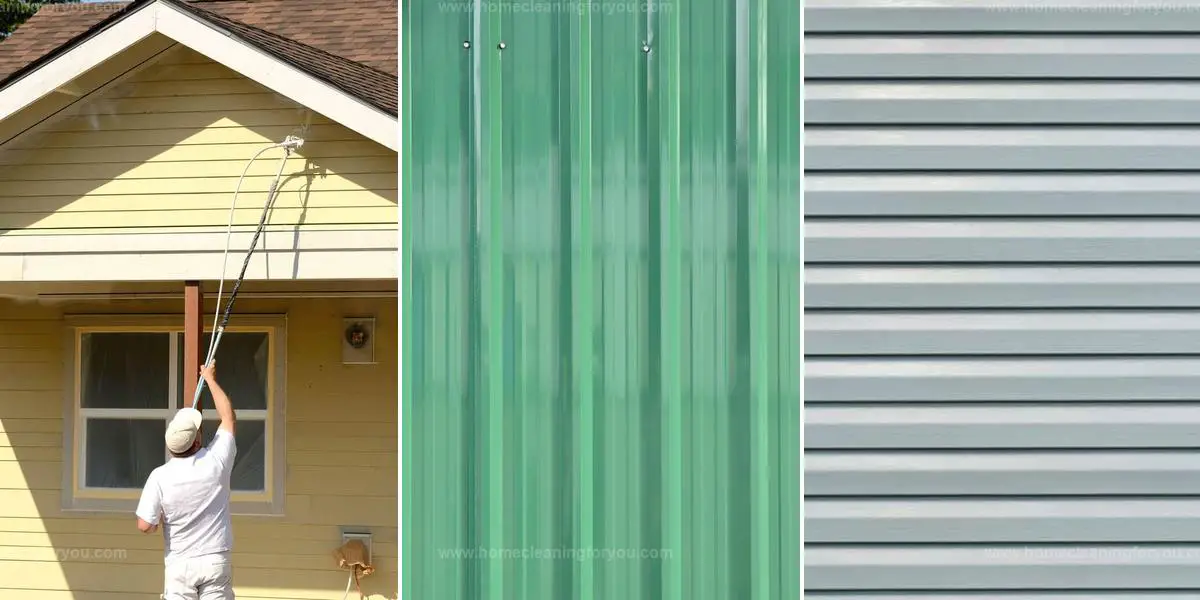
5 Simple Steps to Paint Aluminum Siding Like a Pro
Over time, aluminum siding can lose its original luster, making your home look dull and outdated.
While aluminum is known for its durability and resistance to common issues like rust and water damage, exposure to the elements can cause fading and wear.
Instead of replacing it, a fresh coat of paint can give your siding a brand-new look at a fraction of the cost.
But painting aluminum siding requires proper preparation to ensure a smooth, long-lasting finish.
If you're ready to refresh your home’s exterior, follow these 5 essential steps to paint aluminum siding the right way:
Best Way to Paint Aluminum Siding

Painting aluminum siding is a great way to refresh your home’s exterior and protect it from the elements.
Using the right techniques ensures a smooth, long-lasting finish.
Follow these steps to achieve professional-looking results:
Get Your Supplies Ready
To successfully tackle your painting project, gathering the right materials and tools is essential.
Here’s a handy list of items you should collect:
Being well-equipped helps streamline your process, making it easier and more efficient.
Prep the Siding
After gathering all necessary supplies, placing them about eight feet away from your house to avoid tripping hazards when using a ladder. Protect any nearby plants or landscaping with a tarp laid around the perimeter of your home.
Pouring in an appropriate cleaning solution for your power washer comes next; mild agents work best here, and laundry detergent serves as an excellent option if mixed correctly, use one-fourth cup per four gallons of water for optimal results. Make sure that you adjust the power washer to its lowest setting before beginning, keeping the nozzle at least six feet away from aluminum siding to prevent damage during cleaning.
Begin spraying at the back of your house while utilizing horizontal sweeping motions instead of starting from below since this could harm the siding material itself.
Smooth the Surface by Sanding

Cleaning your siding often reveals paint that has seen better days, particularly if you're using a power washer. When you come across spots where the paint is peeling, it’s crucial to take immediate action.
Before applying a fresh coat of paint, sanding these areas is essential for achieving durability and adherence. Opting for sandpaper with a grit between 80 and 100 will efficiently strip away old layers while ensuring the surface prepares well for painting.
Begin working from the back of your home towards the front as you tackle each section with the sander. Make sure to go over every area twice to ensure complete removal of any remaining paint flakes or imperfections.
Be cautious around moldings and window frames during this step, it's easy to accidentally inflict damage here without proper care. Applying gentle pressure will prevent unnecessary harm to your siding, allowing it to look its best once you've completed all necessary steps before repainting.
Apply a Coat of Primer for Better Adhesion
To achieve a professional finish on your home's siding, start by preparing the primer. Pour it into a paint tray and load your brush, making sure to remove any excess from the edges.
It’s smart to begin at the top of one side of the house and work downward with steady horizontal strokes. As you progress, repositioning your ladder will be essential for maintaining comfort while painting.
If you notice some original color peeking through after applying that first coat, don’t let this concern you; subsequent layers will cover it completely. Aim for at least two coats of primer to ensure thorough coverage across all surfaces.
Keep an eye on drying times listed on the can's back, typically around three to four hours depending on weather conditions, to avoid issues like bubbling or peeling caused by premature painting. For those opting for a paint sprayer instead of traditional brushes, remember proper dilution is crucial in preventing clogs in nozzles during application.
Use sweeping motions as well when spraying each area twice for consistent results across every inch of siding.
Helpful Tips for Priming Surfaces
Using an oil-based primer on aluminum siding is highly recommended, as it offers enhanced protection against environmental factors. An oxidizing primer can also be beneficial; it works to prevent rust and water stains from forming.
When selecting a primer for your project, steer clear of latex options. These primers have chemicals that may react negatively with aluminum, ultimately affecting the quality of your final coat.
Investing in the right type ensures durability and improves the overall look of your painted surface while protecting it effectively over time. Your choice will significantly impact how well the paint adheres and withstands wear and tear throughout its lifespan.
Paint the Siding Evenly
Achieving a flawless exterior paint job begins with proper preparation. Once you finish applying the second coat of primer and it has dried, carefully pour any leftover primer back into its can for future use.
Set this aside while you prepare your painting supplies. Now it's time to switch gears to your chosen paint; pour it into a clean tray and grab a fresh brush, making sure to remove any excess from the bristles against the side of the tray.
To ensure an even application, begin at the rear of your house, gradually working toward the front while starting at the top section of siding. Use sweeping horizontal strokes as you move along, giving extra attention around windows, electrical sockets, and eaves where precision is key.
After allowing approximately two hours for this initial layer to dry thoroughly, proceed with another coat following these same techniques. If opting for efficiency with a paint sprayer instead of traditional brushes or rollers, remember to empty out and clean its reservoir after using primer before switching over to paint application.
Maintain those smooth horizontal motions during spraying as well; when nearing windows or different materials that shouldn't get painted unintentionally narrow down your spray pattern accordingly. For convenience in obtaining tools like sprayers suited for various projects online platforms such as Amazon provide easy access options tailored just right!
Selecting the Right Paint
Selecting the right paint for your aluminum siding is crucial. Opting for acrylic exterior paint ensures durability against various weather conditions. Steer clear of high-gloss options, as they tend to create distracting reflections during sunny days, particularly in warmer climates. Satin and eggshell finishes are popular choices because they effectively conceal scratches, dents, and surface flaws better than shinier alternatives. For convenience, you can find exterior acrylic paint available on Amazon.
Finish with a Second Coat for Lasting Coverage
Applying a second coat of paint can significantly enhance the protection and appearance of your aluminum siding. After letting the initial layer dry, I recommend returning to the back of your house to start this step.
Before diving in, inspect for any imperfections on the surface from that first application; bumps or splatters should be addressed first by gently sanding them down with a sanding block or paper. Tackling these issues early makes it easier to clean up any mess while it's still fresh.
For those working with aluminum siding for their first time, consider spreading out your task over 2 days, priming 1 day allows you some recovery before painting on another day. While tackling such projects, pacing yourself is essential; however, remember that moving too slowly might lead to visible lines once everything dries.
Painting smaller sections at a time helps achieve an even finish and minimizes unwanted marks. Maintaining wet edges during application keeps things looking seamless as well as prevents unnecessary strain on your arms from prolonged effort.
Taking breaks when needed not only aids comfort but also enhances overall efficiency in completing this rewarding home improvement project.
What Type of Paint Works Best for Aluminum Siding?
When selecting paint for aluminum siding, consider using matte, satin, or eggshell finishes. Paints with a higher sheen than satin can create glare on sunny days, making your home less appealing to the eye.
Opting for lower-gloss options helps conceal flaws like dents and scratches more effectively. Keep in mind that flat paints tend not to endure as well as those with mid-sheen finishes; therefore, you might find yourself repainting every four to five years if you choose this route.
For long-lasting results and aesthetic appeal, prioritizing the right finish is essential in maintaining your home's exterior charm while ensuring durability against weather elements.
Is It More Cost-Effective to Paint or Replace Aluminum Siding?
The state of your aluminum siding plays a crucial role in deciding the next steps. Initially, evaluate its condition to choose the most effective approach.
If you notice signs of fading or weathering, applying paint can rejuvenate its appearance significantly. On the other hand, if there are serious issues like deep dents or extensive damage, opting for replacement is likely the wiser choice.
This assessment ensures that you make an informed decision based on how well your siding has held up over time and what it truly needs moving forward.
Can You Use a Power Washer on Aluminum Siding?
Absolutely, aluminum siding can be effectively cleaned using a power washer.
While some professionals caution against this method due to possible risks of damage, many still consider it one of the most effective techniques for cleaning or prepping your siding for painting.
To minimize any potential harm from pressure washing, it's crucial to use a low-pressure setting and maintain a distance of six to eight feet from the surface while working.
Before diving in, conducting a quick test on an inconspicuous section helps confirm that your chosen settings are safe and won’t cause unwanted issues.
How Long Will Paint Last on Aluminum Siding?
When you look at different siding options, aluminum siding holds its ground with a decent lifespan. With the right care and attention, this type of siding can endure for approximately 5 to 10 years before showing signs of wear.
Regular maintenance plays a key role in ensuring it remains functional and visually appealing throughout its life cycle. Investing time in upkeep not only preserves its condition but also enhances your home's exterior charm over the years.
Selecting aluminum means opting for durability combined with manageable longevity that suits various home styles effectively.
When Is the Ideal Time to Paint Aluminum Siding?
Timing plays a crucial role in achieving an excellent paint job on your siding. Optimal conditions occur from spring through fall, when temperatures rise to 50 degrees Fahrenheit or higher.
This temperature range ensures that the paint adheres properly and dries efficiently. Cooler weather can lead to issues such as improper curing, while excessively high temperatures may cause the paint to dry too quickly, resulting in uneven coverage.
Aim for days with minimal humidity and gentle breezes for ideal application conditions. Proper planning around these seasonal factors will significantly enhance the longevity of your painted siding while providing a smooth finish you can be proud of.
How to Maintain Painted Aluminum Siding for Long-Lasting Result
Maintaining your painted aluminum siding is essential to preserve its appearance and extend its lifespan. Regular upkeep not only enhances curb appeal but also protects your home from environmental elements:
Final Notes
I trust this guide has given you the essential details for painting your aluminum siding.
Achieving a high-quality finish starts with excellent preparation.
Begin by thoroughly cleaning the surface and sanding it to create an ideal base for paint application.
Skipping these steps may affect the final outcome, so take your time to prepare well.
Kevin Jones
Founder & Chief Home Organization Strategist
Expertise
Home Organization & Decluttering, Efficient Cleaning Methods & Stain Removal, Sustainable Cleaning Practices, DIY Home Maintenance & Repairs, Space Optimization & Storage Solutions, Budget-Friendly Home Care Strategies
Education
University of Texas at Austin
Kevin Jones is the Founder and Chief Home Organization Strategist at HomeCleaningForYou.com.
He earned a Bachelor of Science in Interior Design from the University of Texas at Austin, focusing on space planning and sustainable design. Specializing in home organization, decluttering, and budget-friendly home care, he helps homeowners create functional and stylish spaces.
Kevin has been featured in lifestyle publications and has collaborated with eco-friendly brands on home organization solutions. He shares his expertise through DIY guides, workshops, and online tutorials. Passionate about minimalism, he enjoys testing new organization methods and exploring sustainable living ideas.