How to Dry Laminate Flooring with Water Underneath
How to dry laminate flooring with water under it? Without a doubt, laminate flooring is a great option for contemporary households. It costs next to nothing to install and withstands hard underfoot well, but on top of that, people love it because of its capabilities to resist moisture.
Despite that, no flooring options can be strong enough to survive a massive flood. If you fail to jump to the rescue in time, your flooring will likely suffer from irreparable damage. Ease your mind; this post is here to provide you with the ultimate solution to save it. Let’s go!

Some Jaw-Dropping Facts About Laminate Flooring
Before shooting to considerable fame in the interior design industry, laminate flooring had a winding history. It was invented and first sold to the public under the name Pergo, thanks to Perstorp, a Swedish company, in 1977.
Seven years later, laminate flooring made its first debut in Europe, then the United States in 1994. Needless to say, the reactions toward the product were positive, and they have fueled up a battle between laminate flooring vs. wood flooring.
Indeed, each has its pros and cons, but there’s no denying that laminate flooring has seen a surge in demand recently. Does it live up to the hype? The follow-up section will provide you with the answer.
Benefits Of Laminate Flooring
Laminate flooring has received much love because it possesses countless advantages, with the most significant having been listed as follows:
Quick Installation
Unlike bamboo flooring or hardwood flooring, the installation of laminate flooring is not much of a challenge because it is a dry installation, which means no mortar or adhesive is needed. Hence, feel free to carry out the process on your own – the result will still be flawless!
Extremely Durable
The upper layer of the product is engineered to uphold minimal wear and tear and standing water well (but there’s still a limit, though). The backing layers are also water-resistant; thus, the chances of distortion are kept to the bare minimum.
Easy Maintenance
You don’t have to be dripping in sweat in order to keep laminate flooring shiny, as it does not call for much upkeep. To preserve its beauty, you just need to sweep or mop it with warm water and a few drops of dish soap. Commercial cleaners can be used, but only once per month.
Realistic Design
Another feature that makes laminate flooring a perennial favorite is its appearance, which is designed to replicate the natural grains of wood with great precision. There are many colors and finishes to choose from, so you can be assured that it will match your cozy home.
There are plenty more benefits to name, but I won’t be going further. Instead, let’s head back to where you started: how to dry laminate flooring when it gets wet. Read on!
Bet you didn’t know laminate flooring possesses such benefits. Let’s see this video to know more:
A Foolproof Guide To Dry Your Laminate Flooring
Before jumping straight to the methods, there are a few things you will want to consider. The issue, sadly, is often beyond saving if the water has reached the core layer. You can say the same thing when the water damage is too severe, such as caused by heavy flooding.
Signs To Know Whether Your Laminate Flooring Cannot Be Saved
I hate to break it to you, but such incidents happen. Sometimes, it’s because prompt actions are not taken, but it can also be due to the severity of the damage. To find out whether your flooring is salvageable, read this section.
Water Has Reached The Core Layer
As a whole, laminate flooring is water-resistant, but there is one layer that does not have this capability: the core layer, also known as the base. It sits on the backing and under the visual layer, followed by several resin ones that act as a shield to ensure the product’s safety.
To know whether the damage has contacted the core layer, step on a damaged floorboard to see if there’s a noticeable change in texture (say, it becomes softer or even spongy). Or, you can even hear a squishy sound, suggesting that water has gotten far and beyond.
Conditions Of Water Damage
As mentioned, the issue often cannot be resolved when there’s too much water or if prompt measures are not taken. It also depends on the water damage source: if it comes from, let’s say, a broken pipe or floodwaters, you will want to replace your flooring.
Delamination
Delamination is a flooring defect caused by improper cleaning methods (usually the overuse of water) or substantial water damage. When excessive moisture is present, the top layer of the boards will break down and eventually become separated from the core.
Swelling Or Bubbling
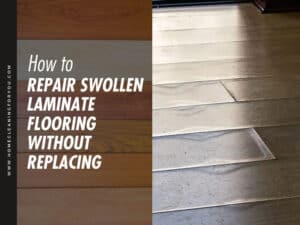
Lastly, if you notice that your flooring swells up or bubbles up at the seams, you can be sure that water has found its way underneath the surface. Don’t fret, as you can repair swollen laminate flooring without replacing it, and it’s pretty effortless thanks to the help of a tool called roller.

Detailed Instructions For Drying Your Laminate Flooring (6 Steps)
Should your laminate flooring not be in the conditions mentioned above, you can kick off the cleaning project. Don’t wait around; assemble the tools, put on your cleaning gloves, and be the hero your flooring needs!
What You Need
- Soapy water
- Bleach
- Microfiber cloth, paper towel, or mop
- Wet-dry vacuum or pump
- Fan or dehumidifier
- Pry bar
- New laminate floorboards (optional)
What To Do
Step 1: Remove Standing Water
To begin with, you will have to get rid of standing water. Depending on how much water you have, you will use the corresponding tool.
- If the water is less than an inch, wick it away using a microfiber cloth or paper towel. As an alternative, sweep the floors using a mop made for cleaning laminate floors.
- If the water is more than an inch, your options include a wet-dry vacuum or a pump.
Note: Do not let standing water dry out on its own because it is unfeasible (even if it is, it will take you weeks). These implements should reduce the waiting time to 12-36 hours. You can accelerate the drying process by keeping a fan running at the highest setting.
Step 2: Lift Up The Flooring
Now, remove each floorboard by pulling up the trims around the perimeter. Keep the wet-dry vacuum next to you to extract the remaining water while doing this.
- If the floorboards are parallel to the water spill, the job is easy. Start from the board tilted upward and move along the course. You only have to remove the affected ones.
- If the floorboards sit perpendicular to the water spill, you have no choice but to pull up the entire flooring.
Remove your laminate flooring like a pro with these detailed instructions.
Step 3: Dry The Floorboards
Set the floorboards aside and, ideally, separate the wet and dry ones. Next, direct a fan or a heater at them until they are dry to touch. Run two devices simultaneously if you wish to cut back on the waiting time.

Step 4: Disinfect The Floorboards
When contacting flood or sewage waters, you will have to sanitize every floorboard carefully prior to reinstallation. Such waters contain harmful microorganisms, from viruses to bacteria, and they will make you suffer from many critical illnesses, such as diarrhea or vomiting. (1)
To disinfect the floorboards, ensure that no excess moisture is underneath the surface by wiping each of them with microfiber cloths. If you wish, you can clean them with soapy water and proceed to disinfect them with a mixture made of household bleach and water.
Step 5: Clean The Subfloor
Don’t forget the subfloor! To clean it, you will also give it a meticulous rinse with soapy water. Next, disinfect it with the same bleach solution you have previously used for the floorboards. Allow the subfloor to air dry thoroughly until you move on to the final step.
Step 6.1: Reinstall Your Laminate Flooring In Dry Areas
Your laminate floorboards are now ready to go back to where they are! If some boards have appeared to become distorted or squishy, it’s a good idea to replace them. Finish your work by reinstalling the trims, and it’s done!

Step 6.2: Reinstall Your Laminate Flooring In Wet Areas
If you are replacing the floorboards in high-moisture zones, such as the bathroom or kitchen, keep these tips in mind.
- If you plan to take up the entire flooring, it is recommended that you remove the toilet and other fixtures first. After the installation of new flooring, you can put them back in place. It sounds laborious but will help prevent the chances of caulk cracking around the bathroom’s pieces.
- Don’t skip the laminate flooring underlayment. Besides controlling moisture, it can reduce noise and absorb shock like a pro.
- Caulk the perimeter (¼ – ½ inches) with waterproof silicone.
- Seal off where the flooring ends with decorative borders, baseboards, or moldings.
- Apply glue if you wish. It will block the way, preventing moisture from seeping through and causing further damage to your flooring.
Note: Laminate boards are often purchased in packs, so the chances are that you can’t buy a specific number of floorboards to replace the damaged ones. The solution? Take a look at the attics, or contact the previous owner to find out if they still have extra floorboards.

Don’t hesitate to give your room a decorative touch with elastic silicone. You can see this video to know more:
Save These Valuable Tips To Keep The Moisture Away
Moisture and your laminate flooring can never live in peace. And, of course, it’s moisture that has to go. To keep it away for good (or at least to the smallest degree), turn to the tips below. Your only regret is not having known them in the first place!
- Stop the leak source: Of course, you cannot predict and stop a flood, but it is viable to put an end to constant drippings in your bathroom. Although it is just a minor leak, it will become a major problem and wreak havoc on your home.
- Clean up spills quickly: When you knock over a can of soda by chance, act quickly and clean it up. If left on for too long, it will damage the finish, and the only approach to bring the shine back is to repaint your laminate flooring.
- Purchase a dehumidifier: Should you live in an area with high humidity, it is wise to think about getting a dehumidifier. The device will control your home’s moisture levels and also mitigate the risks of mold, mildew, and allergens.
- Mop with a damp head: Ensure that you have wrung out excess water from the mop head thoroughly. Cleaning with a dripping head will not only damage the flooring but also extend the drying time drastically.
- Lay down rugs: Guard your flooring against splashes with rubber mats or area rugs, if possible. Such textiles can also minimize the risk of slipping when you leave the tub.
- Seal your flooring: One of the long-term solutions to the problem is to apply a layer of urethane to protect your flooring. Plus, consider sealing the locking mechanism; it should help you lift the floorboards more easily as well, just in case you move.
- Install waterproof laminate: For your instance, there are many waterproof laminate flooring options for you to consider these days. They are not too expensive and ideal for moisture-prone areas: kitchen, bathroom, children’s playroom, and more.
And, here’s a friendly reminder before I end my post. If you fear that you cannot get the work done yourself, your safest bet is to hand the job over to a professional right from the start so as to steer clear from further issues (mainly if you don’t know much about woodworking).

Let’s find out how to install laminate flooring – beginner-friendly.
FAQs
Dazed and confused? Don’t skip the upcoming question, where I have rounded up for you a few related questions and answers about drying laminate flooring after water damage.
Save Your Laminate Flooring From Big Trouble
With my comprehensive guide, I hope that you have known how to dry laminate flooring with water under it. From now on, save your cash from contacting an expert or disposing of your laminate floorboards after water damage – just grab your cleaning supplies, and the problem is solved!
That was such a wild ride! Now, it’s your turn to share with me the result of your work? Did it go plain sailing? Just comment below, and I’ll reach out as quickly as possible. Finally, don’t forget to link this post to your loved ones – they will find it helpful one day!

References
- (2021). Retrieved from https://dhss.delaware.gov/dhss/dph/files/sewagefaq.pdf
- (2021). Retrieved from https://www.michigan.gov/documents/michiganprepares/Bleach_Fact_Sheet_08-2014_466233_7.pdf



Samantha Lee
Head Cleaning Expert
Expertise
Professional Home Cleaning, Green Cleaning Techniques, Stain Removal & Fabric Care, DIY Home Maintenance & Organization, Sustainable Cleaning Products, Home Care for Busy Lifestyles
Education
University of Denver
Samantha Lee is the Head Cleaning Expert at HomeCleaningForYou.com, specializing in eco-friendly home care. She holds a Bachelor of Science in Environmental Science from the University of Denver, focusing on sustainable cleaning solutions.
With expertise in green cleaning, stain removal, and DIY home maintenance, she helps homeowners keep their spaces fresh and chemical-free. Samantha has been featured in lifestyle publications and has partnered with brands promoting natural cleaning products.
She also shares practical tips through her blog, online courses, and workshops. Passionate about sustainability, she enjoys testing new eco-friendly cleaning methods and spending time outdoors.